- Tracking Accepts and Declines
- Tagging guests
- Linking guests together
- RSVP'ing on behalf of guests
- Exporting guest lists
HOW CAN I SEE WHO HAS ACCEPTED AND WHO HAS DECLINED?
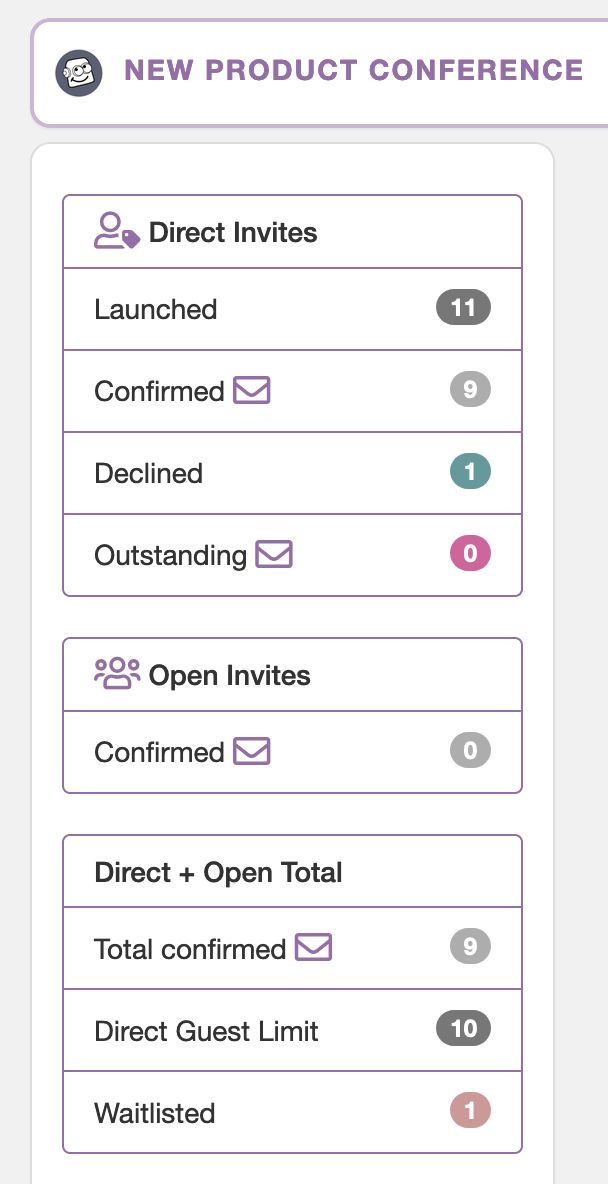
For a quick overview, go to Event Status. The left hand column gives you all your key guest stats. The Confirmed & Held number at the bottom is the total number of places at your event currently reserved.

For guest-by-guest detail displayed per-invite, click on any of the purple buttons in the Package panel. This will reveal all the invites of that Seating Package type which have been sent. For each Invite, the colored badges show how many Outstanding, Confirmed, Declined, and Waitlisted guests make up the total.

Clicking on the name of any individual Invite reveals the Invite Details for that invite. You can look for any individual, or sort the list by Outstanding, Confirmed, Declined, and Waitlisted guests.
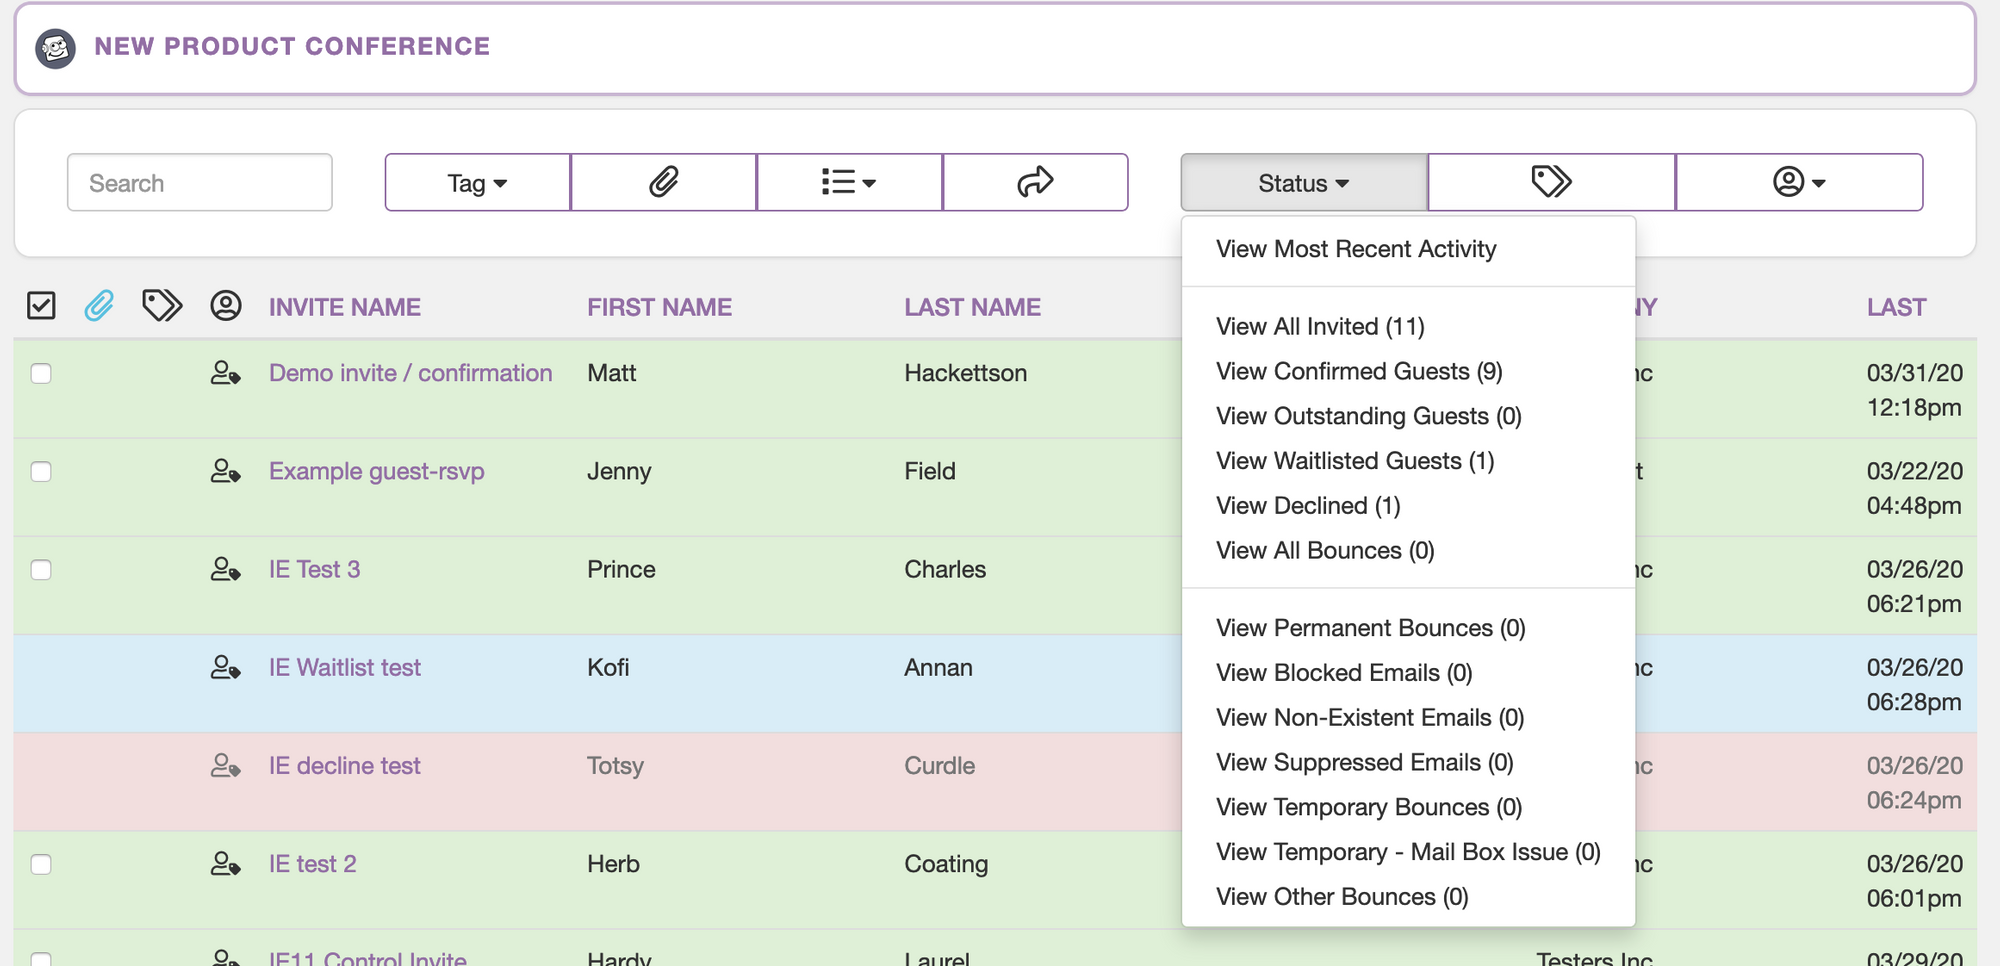
For detail on an individual level, go to Guest List. The main table displays everyone who has been invited, plus everybody who has registered using the Open Registration page. All Confirmed guest rows are green, all Declined guest rows are red and all Waitlisted guest rows are blue.
Any bounced invites are also marked as yellow rows, with an explanation of the type of bounce viewable by mousing over the status button in their row.
You can filter guests by status or by guest-type using the dropdowns.


I NEED TO MARK SOME GUESTS AS VIP'S AND SOME AS VEGETARIAN. HOW DO I DO THAT?
Go to Guest List. You can create and add 'Tags' to any guests. To create a Tag, click on Tag > Add New. To apply this tag to any guest(s), select the checkbox to the left of their row in the Guest List, then click Tag> [name of tag].
You can filter the Guest List to display guests by Tag. Click on the Tags icon to open up the Tag Filter modal.
Note: If you select more than one tag to filter by, the result will be any guests who are assigned all the selected tags
I HAVE TWO GUESTS WHO MUST BE SEATED TOGETHER. HOW CAN I MAKE SURE THIS HAPPENS?
Go to Guest List. Find both guests using the search bar and select their checkboxes on the left of their row. Then click the paperclip icon in the header bar. This will link the two guests in Seatrobot for that event. When seating your guests, Seatrobot will keep them together. They will also appear together when searching for either guest in Check-In
A GUEST CALLED ME TO CONFIRM THEY WOULD ATTEND MY EVENT INSTEAD OF ACCEPTING VIA THE EMAIL INVITE. CAN I RSVP FOR THEM?
Yes. Go to Guest List. Find the guest using the search bar. Click on their Invite name. This will take you to their Guest RSVP page. You can Accept or Decline their invite on their behalf here. You can also edit their guest info here if necessary.
CAN I EXPORT MY GUEST LIST TO SEND TO SOMEONE?
Yes. Go to Guest List. Click on the Share Arrow Export icon in the tool bar at the top. This will export a .csv file of the current view of the Guest List. You can filter the Guest List in any way you like before exporting.