The Check-In features just got a bunch more powerful. Now you can print labels for guest badges direct from check-in, using Chrome and Dymo badge printers.
For large events, this is useful when guests arrive who need their name badges altered - or when guests turn up who are replacing other guests, or who are filling reserved empty seats.
For smaller events, this feature allows you to print labels for guests and stick them to blank badges on demand, rather than having to pre-print guest badges in advance.
To get set up for this, have your Dymo Turbo 450 printer drivers installed in your computer and connected via a usb port, and access Seatrobot using the Chrome browser. Now follow these steps:
- Open Check-In and click the 'View All' button to display all guests in your event.
- Click on the 'Edit' icon on any guest name. You will see the following dialog:
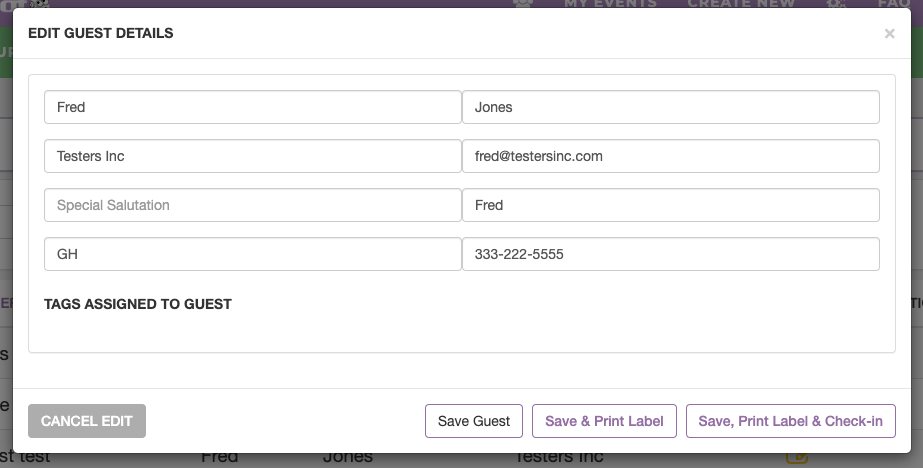
3. Click the 'Save & Print Label' button. The guest badge details will open in a new tab in your Chrome web browser.
4. In your web browser toolbar, click File>Print. This will open the Print dialog. Pre-set your print settings like in the image below:
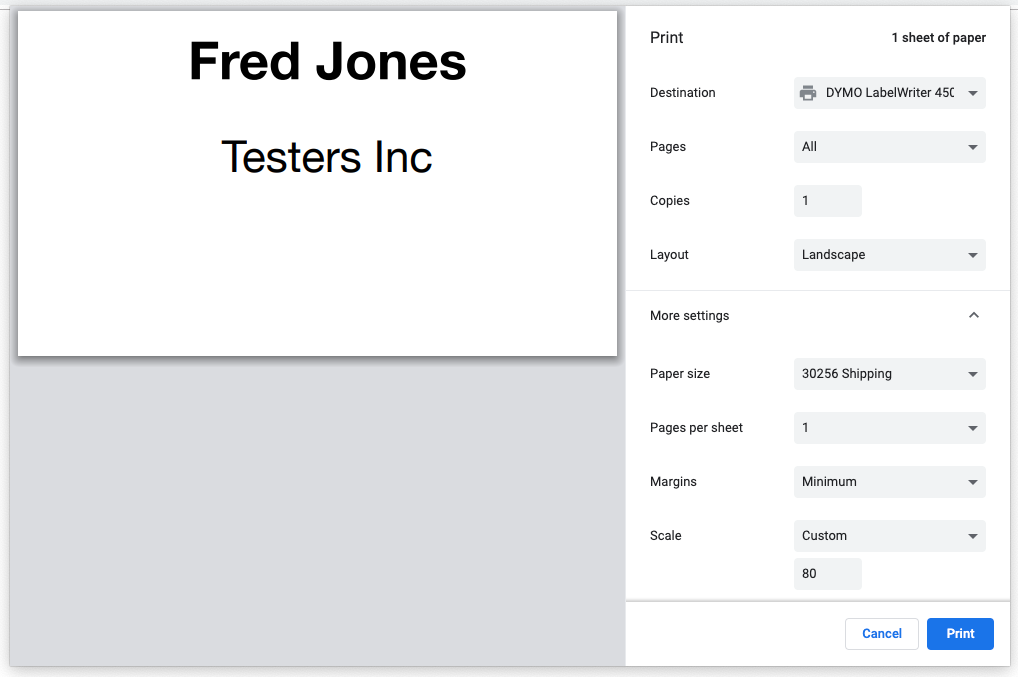
Note: under the 'More Settings' dropdown, select the correct label size you are using.
For regular badging, Seatrobot recommends using Dymo 30256 shipping labels. These are 1" shorter than the standard 4" x 3" name badge cards. This means that your printed label can be affixed to a standard 4" x 3" name badge card, leaving 1" head space at the top of the card. This is very useful if you use pre-printed name badge cards with logos, event headers etc. printed on them.
Note also that 'Margins' are set to 'Minimum', and 'Scale' is set to 'Custom' and then '80%'. You can play around with this to give the exact placement on the label you prefer.
5. Print a test label. If you are happy with the results you are now set up for printing labels for any guest.
6. To print a guest label, find the guest in the Check-In list (either scroll down your list or type their name in the search field), click on the Edit icon, and then click the 'Save & Print Label' button or the 'Save, Print Label and Check-In" button. The latter will create your geust label printing page and also automatically mark your guest as checked-in.
Note: for events with the 'Assigned Seating' function active, your Check-In page will display TWO icons for each guest - an Edit Icon and a "Swap" icon. The Edit Icon is used to print labels, and to edit the guest information before printing (say, correcting a misspelled name). The Swap Icon is used to replace a guest in your guest list with another guest (i.e. give their reserved seat to someone else - see image below). You can use the search field in this dialog to find the replacement guest in your contact database, or enter their information as new in the info fields, before Saving, Printing and checking them, in. The advantage of the 'Swap' feature is that Seatrobot keeps a record of the original guest and displays both the original guest and the replacement guest when searching for either in Check-In. For seated events, Seatrobot will remove the original geust from their table on the Seat Map and replace them with the new guest, auotmatically applying the correct seat number etc.